|
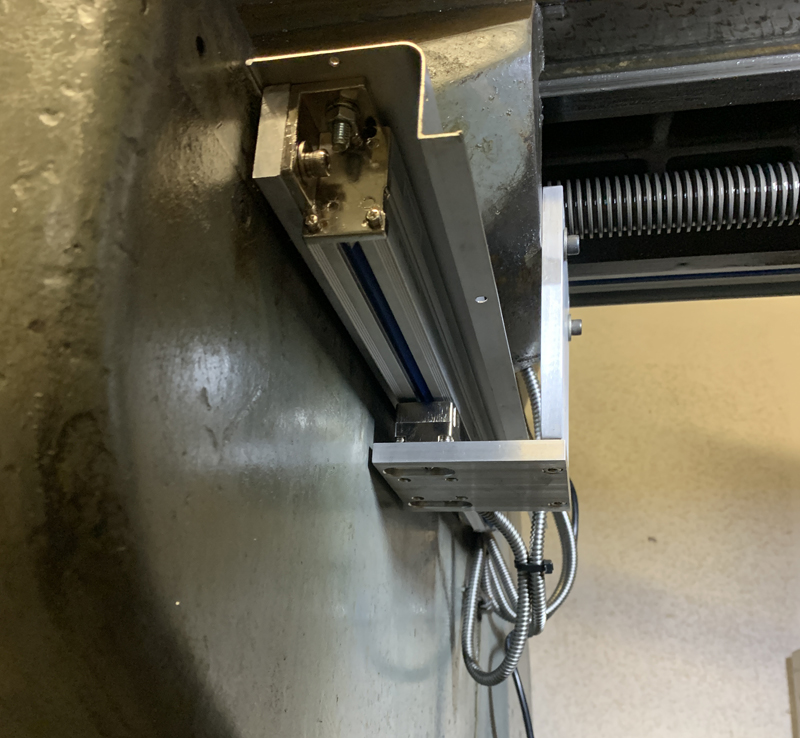
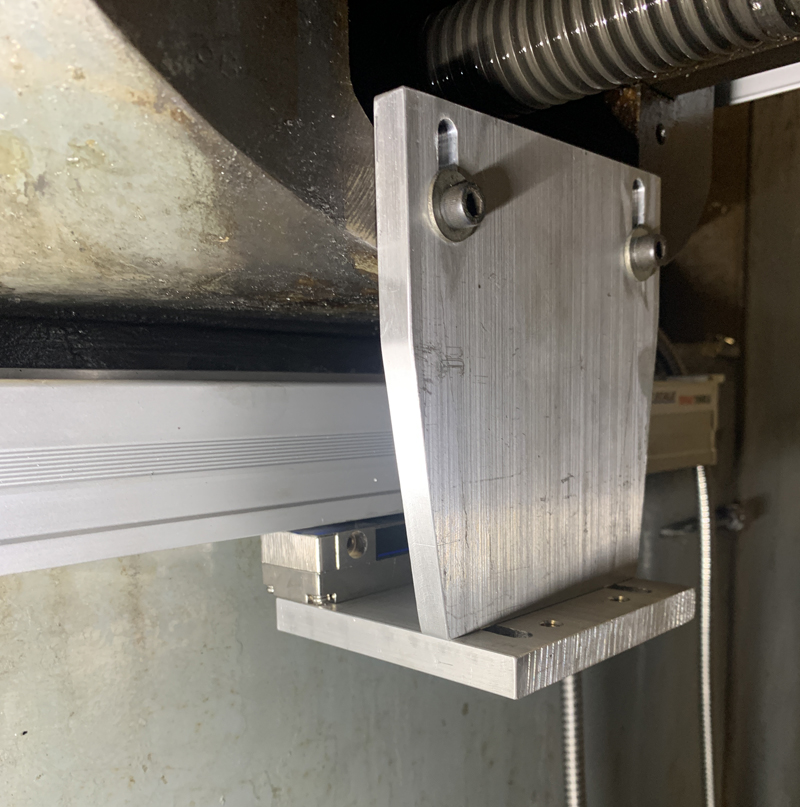
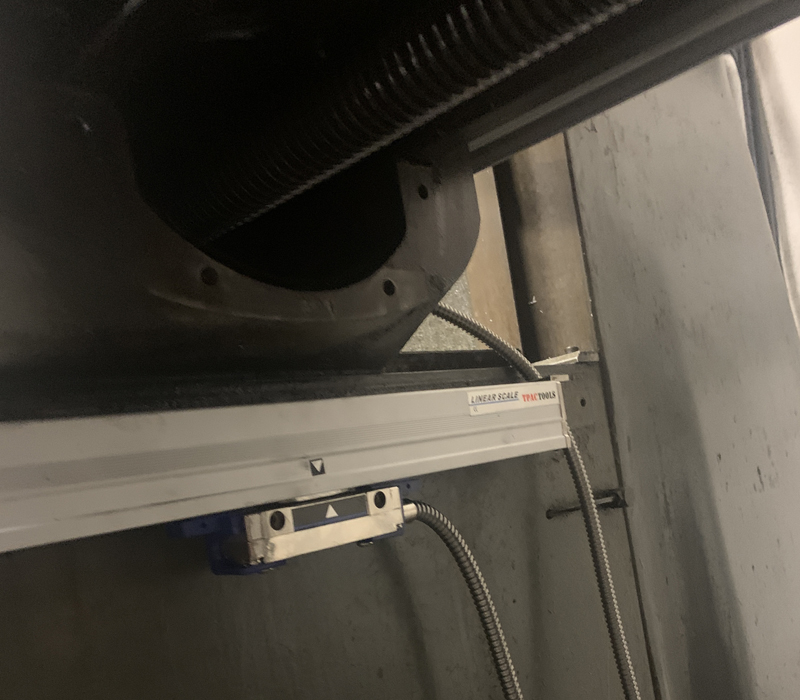
01 December, 2023 I spent another day at the shop yesterday - finishing up the mill DRO install. I wasn't happy with how the "Y" axis reader head brackets were installed; simply turning the bottom plate around 180 degrees and reattaching it solved the issue for me. I also took the time to readjust the fit - the reader head needs to be positioned accurately for long term reliability. The scale/reader head assembly is shipped with support blocks that set the correct position of the reader head; we left them in place while installing and adjusting the mounting brackets to ensure we got it right. It's now as close to perfect as I can get it...
Another, related project, was to reinstall the "X" axis power feed "travel stops". Our original DRO scales mounted differently than the new ones and the power feed stops were mounted on the back of the mill table. The new DRO scales wanted to be mounted where the power feed stops were so they had to be removed and relocated. That required some new brackets and special "T" nuts - good thing we have a mill! I'm calling the install complete at this point.
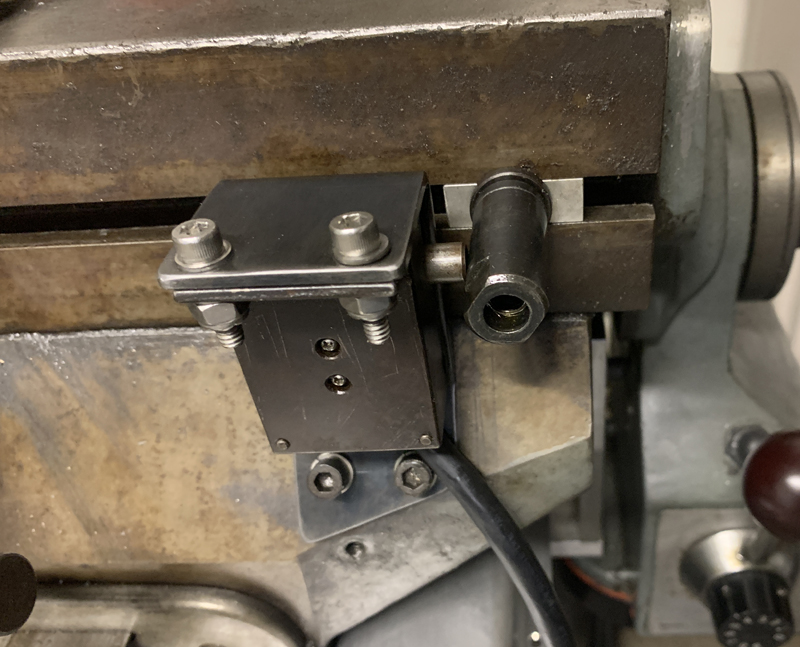
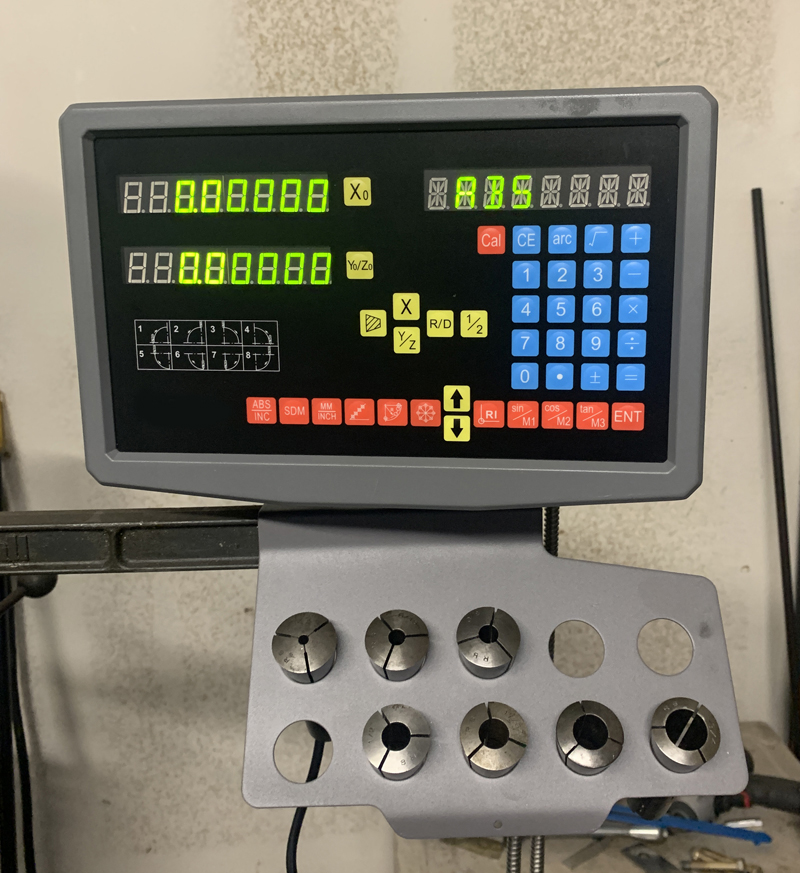
28 November, 2023 I completed the mill DRO installation today - it wasn't difficult to fabricate the brackets I needed to support the "Y" axis read head. The kit came with generic brackets that didn't solve the issue completely but I was able to use one of them in addition to one I fabricated. I'm very pleased with the new DRO system - it seems very accurate, repeatable and "feature rich". I'm sorry to part with the Newall system but the repair/replacement costs were unreasonable for our shop.
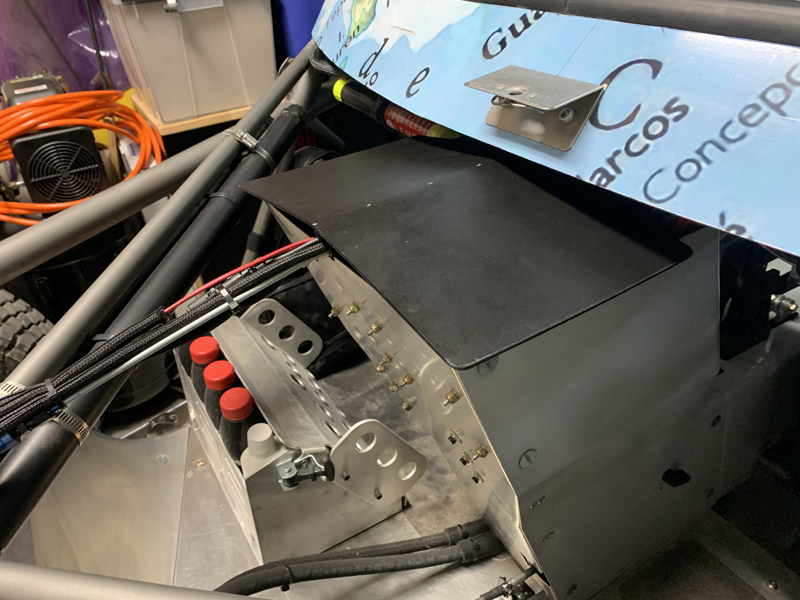
26 November, 2023 I worked on the Bridgeport mill DRO (Digital Read Out) yesterday. The "X" axis (long dimension on the table) display had become unreliable last time I used it, requiring more work to accomplish the task at hand. The DRO came with the mill when we purchased it used (very used but fine for our needs...). The DRO was working but not reliably when delivered to us - we repaired it ourselves and it worked fine for years but finally seems now to have expired. I spent some time troubleshooting the current problem and discovered that the display unit has an electronic fault beyond my ability to repair. It's a "Newall" display and scales - an industrial quality unit that is very expensive to repair or replace so we've gone a different route. Complete 2-axis DRO kits are available on-line, ranging in price (and quality) from under $200 to over $3K. We elected to go with a "middle of the road" system that is heavier duty than a "hobbyist" unit but not quite industrial quality. Unfortunately, none of the previous system can be re-used; the Newall scales are fully functional but not compatible with the new display unit. I spent yesterday beginning the process of removing the Newall hardware and installing the new replacements. It's not a difficult job, just a little "fiddly" to get everything aligned perfectly - necessary for reliability and accuracy. I have the "X" axis fully installed and the "Y" axis nearly so. On my next visit to the shop, I'll finalize the "Y" axis installation (the scale is installed but I need to fabricate some mounting brackets for the "read head"), manage all the cabling and verify that everything works as expected. So far, the "X" axis seems to work perfectly and is accurate to 5 microns (0.0002") - much better than we need. Hopefully the "Y" axis will perform just as well.
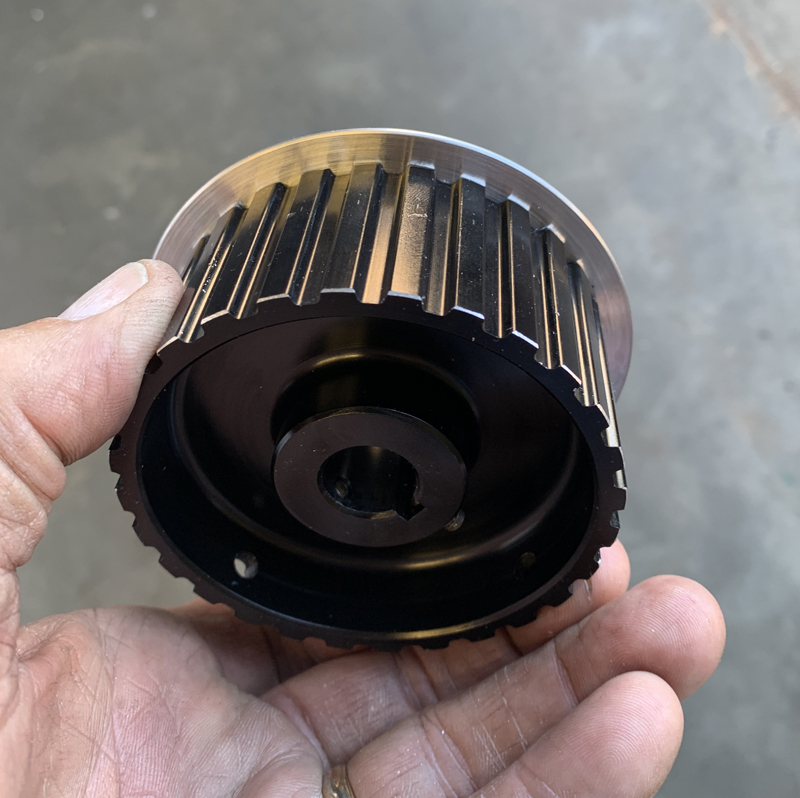
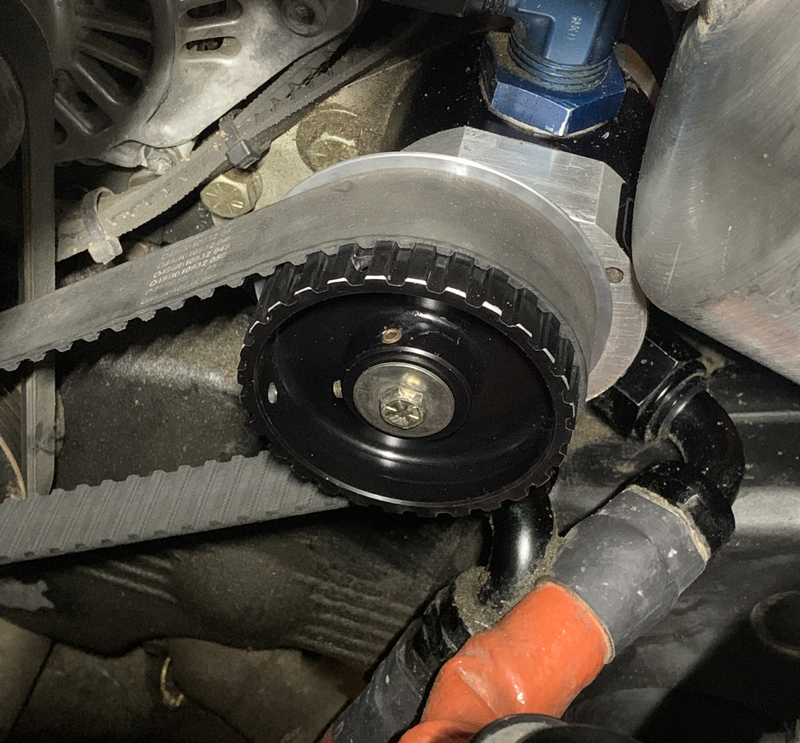
21 November, 2023 We spent a little time at the machine shop last week - we wanted to make an oil pump pulley "belt guard" for the pre-runner. The pump pulley is driven by a "cog belt" but the pump mount has no provisions for adjusting the belt tracking. The "drive" pulley on the crankshaft does limit how far the belt can wander at the crankshaft end but it doesn't do a very good job of controlling belt tracking at the pump pulley. We've noticed that it tends to run fairly close to the pump body; it isn't in contact but we want to ensure that it stays that way...
24 October, 2023 The pre-runner radiator fans are re-wired and working as expected. The two fans now run in "parallel" electrically; they are independent circuits so a failure in one will not affect the other (unless we have a complete loss of electrical power - in which case the engine isn't going to run anyway...). We've wired them with separate controls; one is automatically controlled by the ECU and the other manually by a switch on the instrument panel. If we find that we want to "tie" the control circuits together again, it's a simple one-wire connection that needs to be completed. While we had the side panels off the car, we had a good look at everything; we noticed a couple of areas where the "Steel It" paint was a bit thin and rust was developing. It was nothing serious but we removed the rust and re-painted those areas. This was also a good opportunity to thoroughly clean the car after our Baja outing; there was dried mud everywhere (and we didn't go anywhere near water - those "dry" lakebeds sometimes aren't!)... When we washed the car, we noticed that water runs off the windshield and can get past the hood, dripping into the center console/electronics. That's obviously a potential problem that we needed to resolve. Our solution was to fabricate an ABS "umbrella" to cover the top of the center console under the windshield and hood. Any water that gets inside the hood will now run off to the side and the electronics will remain dry. We were careful to ensure that cooling air can still circulate as needed...
Finally, we noticed that we had a very small leak at the fuel pump. The "banjo" fitting at the pump outlet was "weeping" a bit and nothing we did helped... We worked on it for over an hour and finally just changed the entire pump/filter plumbing arrangement to eliminate the banjo fitting - that seems to have done the trick. We'll keep an eye on it though; fuel leaks are dangerous things, even when it's just a "weep"!
20 October, 2023 I've been looking into the radiator fan issue we had while in Baja last week; turns out that we had a "Weatherpack" connector failure... When we wired the car, we were careful to find power requirement specifications for every component so that we could correctly "size" the wiring. I'm not sure where we went wrong but the radiator fans draw twice the power we were expecting and that led to undersized wiring and connectors... That's an easily resolved issue but we're planning to make a minor change in how the fans are controlled in addition to upgrading the wire and connectors. The new plan is to have the ECU control only one of the two fans - the other fan will be controlled manually through our "Switch Pros" panel on the dashboard and a relay near the fans. From what we saw during our Baja outings, we believe that a single fan will handle "normal" cooling requirements; if needed, we can manually select the second fan to "on". This will give us some redundancy and reduce our electrical loads at the same time. If it turns out that we need both fans to run often enough, we'll just have the ECU control both. We'll retain a manual method of activating the fans as a backup. All the ECU and fan wiring is under the rear seats so it requires a bit of disassembly to get to everything - fortunately, the side panels come off easily, giving us good access.
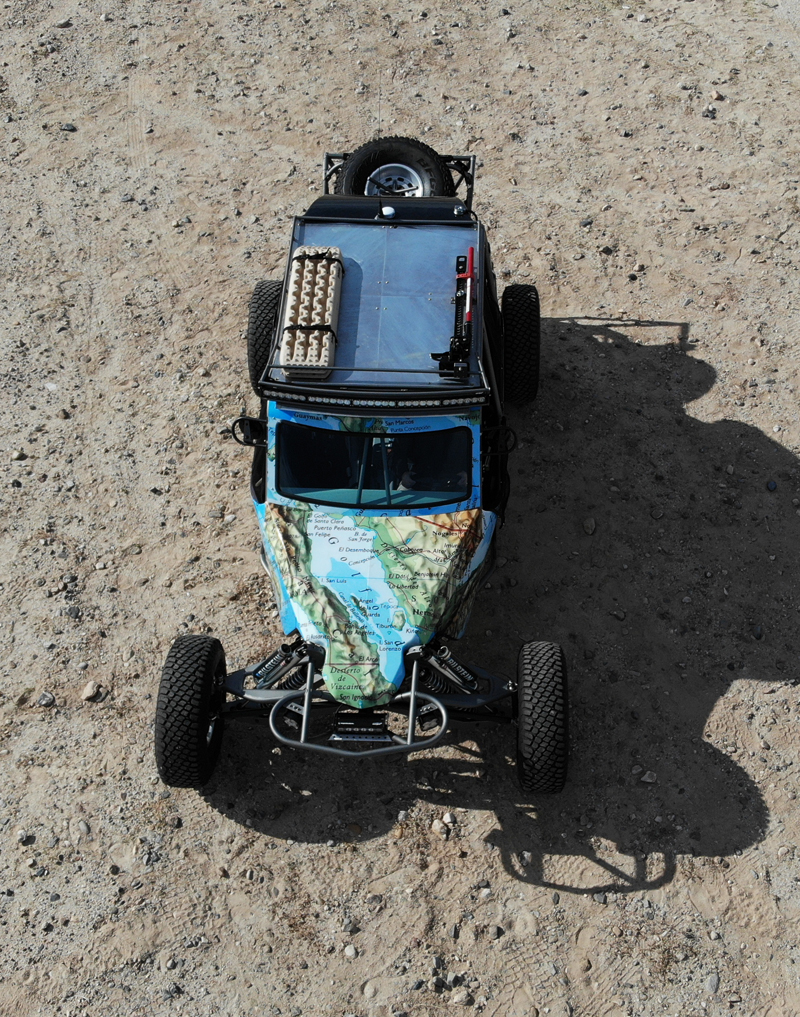
14 October, 2023 We had a great "family" trip to Baja over the last 10 days; everyone had a great time and the pre-runner was awesome!
Click on the image below for Trevor's Instagram
Click on the image below for
Trevor's Instagram
The car ran better and better all week; it seemed to "break in" and run smoother, quieter and stronger as the miles accumulated. We had no significant issues with the car; it only required a couple of minor adjustments. We did have a small radiator fan issue that we temporarily resolved by bypassing the automatic system. We'll fully resolve the problem now that we're back at home.
25 May, 2023 There hasn't been much to report over the last several months and probably not much to come in the immediate future... Having said that, I spent the day working on the race car. It has been sitting "race-ready" for the last couple of years; we're thinking about running some "local" races this year so it was time to start a "mini-prep". My first priority was to make sure the engine was in good condition and safe to run - aside from needing to replace a fuel line, it was good to go and ran great! All the systems work normally but I'll be installing a new battery to ensure reliable starts when we take it out. It was really fun to hear our high compression 1600 motor run again!
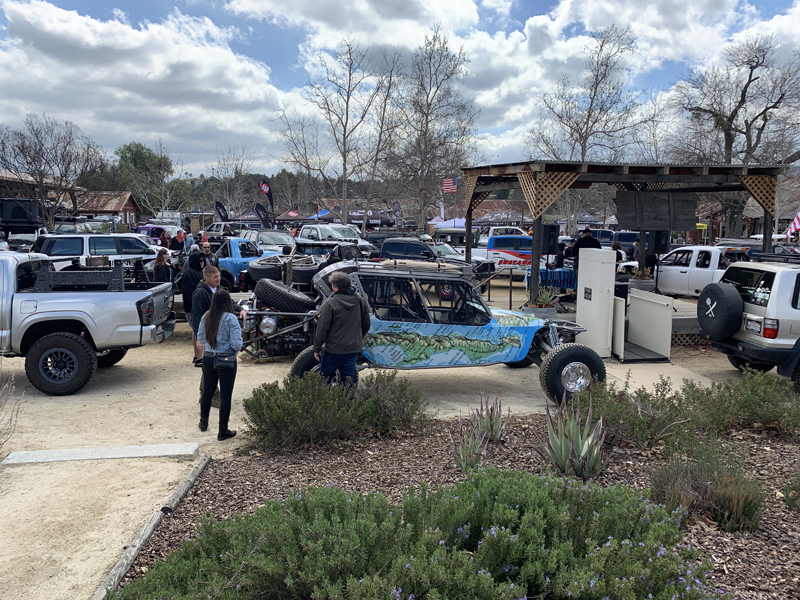
05 March, 2023 We attended the Temecula, CA Off-Road Car Show yesterday with our pre-runner. We were one of only three pre-runner buggies; the majority of cars seemed to be "Over-Landers" and "Mall-Runners" with a few serious off-road capable vehicles in the mix... Our pre-runner received lots of very positive attention throughout the day. It was fun to show it again.
We've been really busy with "life" and the weather has been unusually bad for the last several weeks; we haven't had an opportunity to get the pre-runner out to the desert again since our first test and tune day.
09 February, 2023 We installed and leak checked our new fuel rails on the pre-runner engine today. They fit perfectly, we like how the injectors fit in the correctly machined pockets and everything is leak-free under pressure. This was an important safety upgrade that needed to be done; we're glad to have it complete and tested!
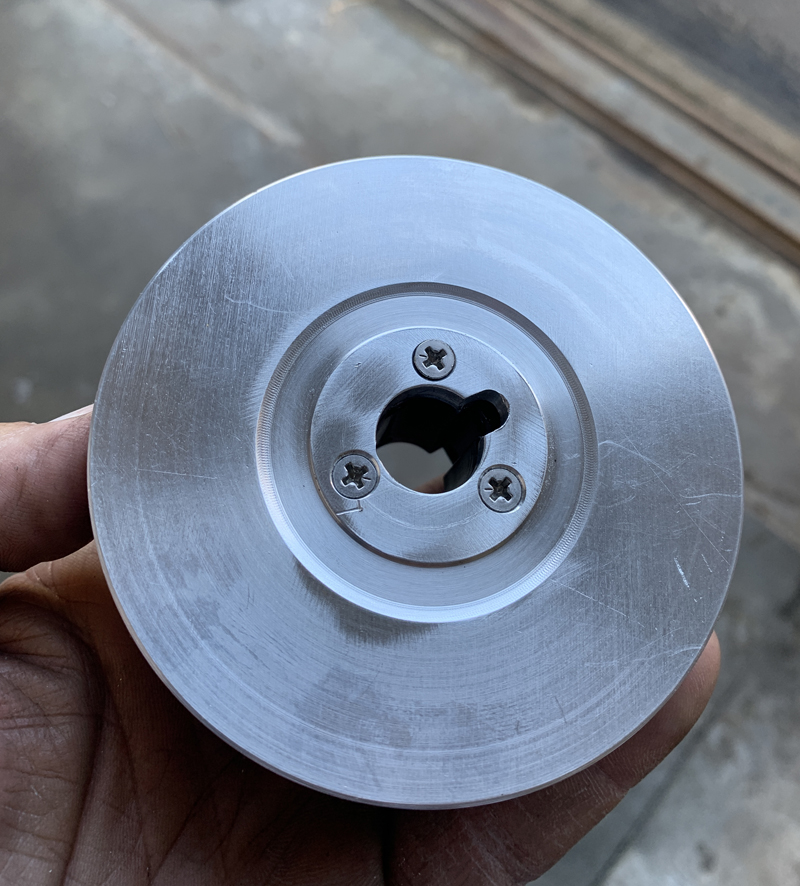
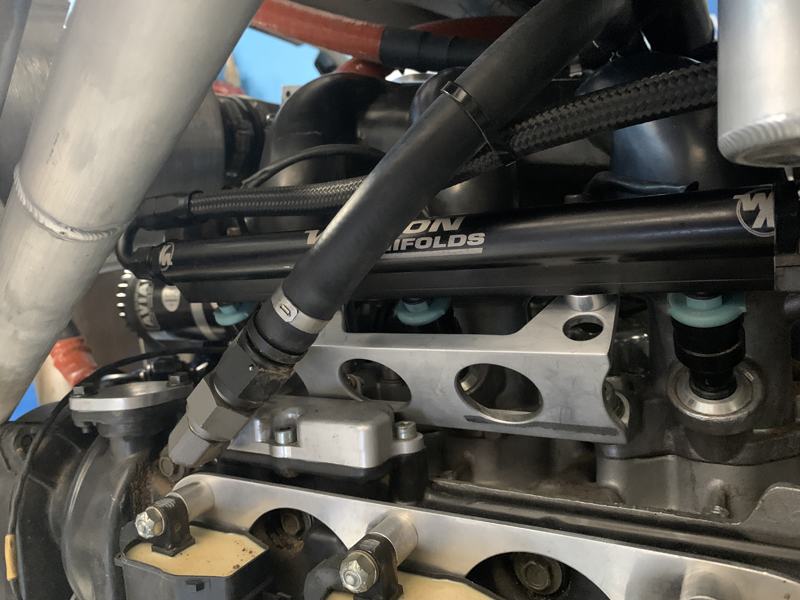
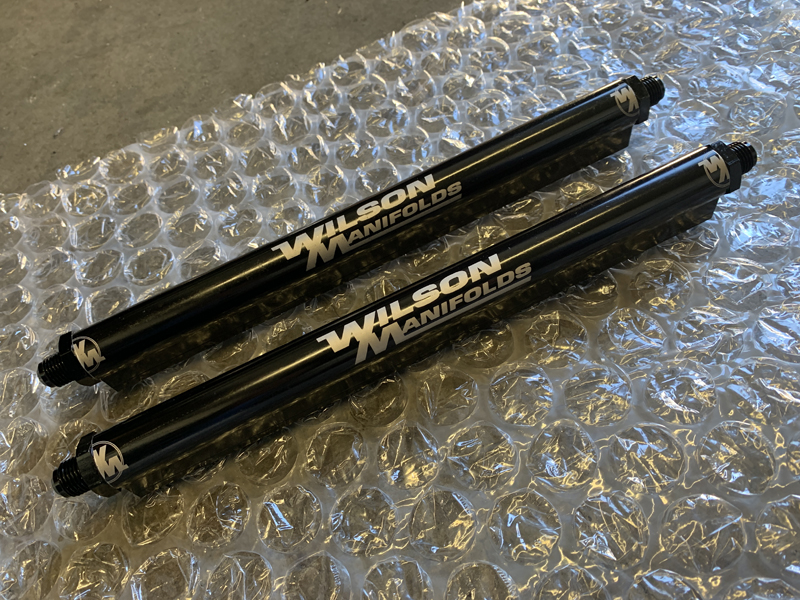
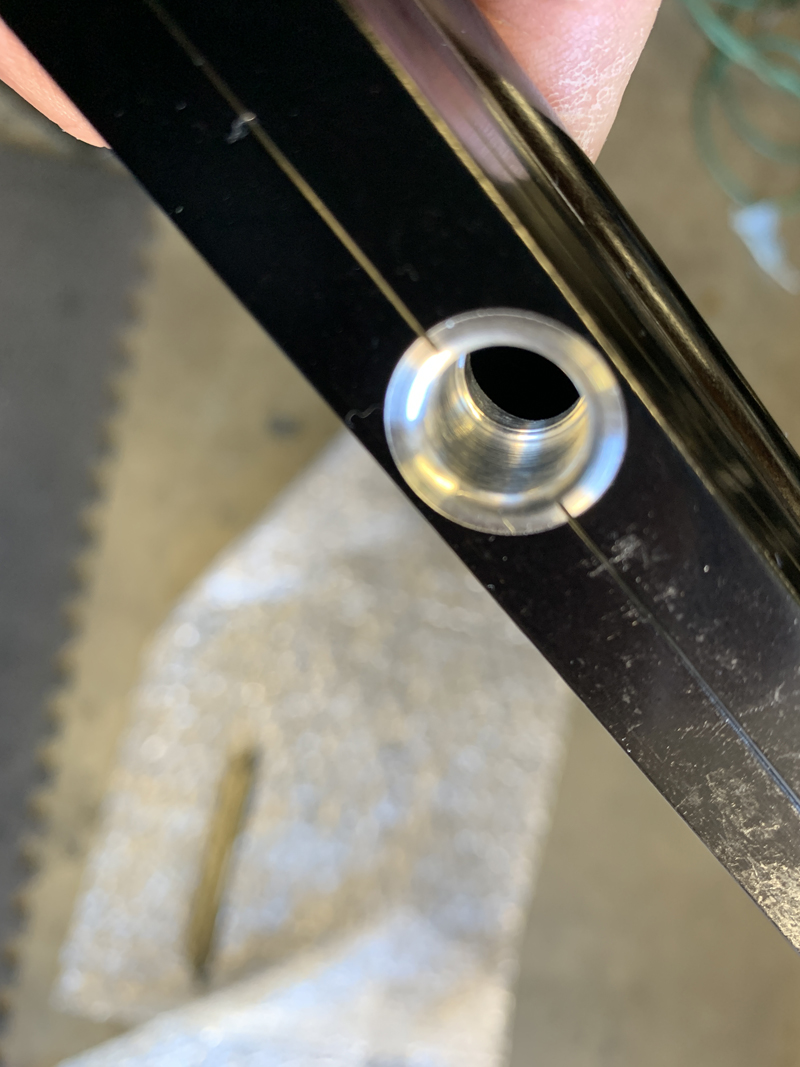
31 January, 2023 I spent a few hours at the shop today machining our new fuel rails. It's really nice to have our own machine shop so we can make "custom" parts for the pre-runner. The small amount of money we spent on a used mill and lathe has been a good investment in both time and money... We enjoy using them and it's also nice to be able to make all the custom parts ourselves! As I noted in my previous update, the new fuel rails are an important safety enhancement and I'm glad to have them ready to install before our next outing. Here are a couple of photos:
28 January, 2023 Trevor and I spent today working the few items we wanted to address after our first pre-runner test and tune session. We also spent some time working on his "new" 1980's Toyota Land Cruiser; lots of little things to improve, all ignition related. The pre-runner GPS was not finding our position during our test and tune - it was not seeing the "Point 1 Baja" external antenna on the NEMA 2000 network. I discovered why as soon as I removed the hood to look at the wiring... The problem was, as I thought, an installation error. While the network was receiving the power it needed, it wasn't connected to the display unit... As soon as I connected the cable, the external antenna became the primary navigation source and very quickly established a location fix - even though we were inside the garage. Easy fix. Trevor had the oil pump off the engine to adjust the pressure "up" a bit and to address a small oil leak from the pressure adjusting screw. That sounds like an easy thing but he has to remove the air filter, drain the oil and take much of the oil system plumbing apart to get to the pump - it's a several hour job, start to finish. It'd be nice if the pressure adjusting screw was accessible without so much work... While Trevor was working on the oil pump, I added a bit of spring "pre-load" to the front suspension - it was sagging a little after our test and tune. We may need to add more pre-load after our next test and tune - it takes a few hard miles for a new suspension system to "settle". We liked the way the front suspension felt so we didn't change any bypass settings; we just brought the ride height back to where we want it. After adjusting the front suspension, I removed one of the fuel injection system "fuel rails" to measure the critical dimensions. Our current rails work fine but they lack an important injector "pocket" feature; that omission could allow the injector seals to "escape" and cause a serious fuel leak and fire... We have tooling to correctly mill the injector pockets in our new rails and now that we have the critical dimensions, we'll get right on it.
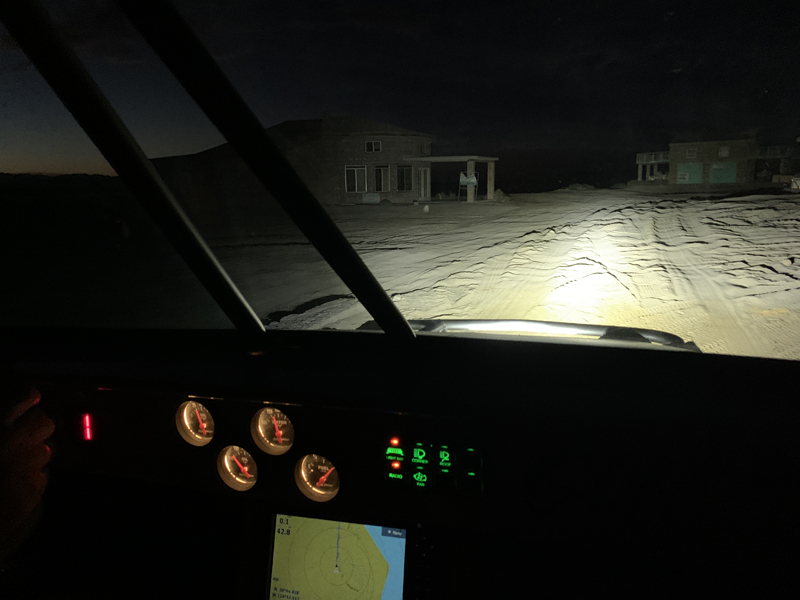
05 January, 2023 I had just a few minutes with the pre-runner today to start looking into the GPS issue and to begin designing our new fuel rails. We now have all the tools and hardware we need to fabricate the rails; I just need to find the time... A quick look at our Lowrance GPS display unit revealed that it's not seeing the "Point 1 Baja" antenna for some reason - it's not available to select in the GPS source menu. That leaves installation errors or an outright failure of the antenna to explain why it isn't "present". My first thought is that it's probably an installation error - lack of power to the "network" is my current guess. When we have time, I'll double check to see that it's properly connected to +12V when the GPS is powered on. If that's not the issue, it'll either be a cabling issue or an outright antenna failure. It did work properly "on the bench" so I'm betting it's an installation error...
03 January, 2023
Happy New Year! We're working a few little issues on the pre-runner that need some attention: the GPS external antenna doesn't seem to be working, the oil pressure needs to be adjusted "up" a little, the rear suspension is a little "harsh" and the engine's fuel rails are incorrectly designed/machined. The GPS antenna issue is one of a few things - no power to the "network", not connected properly, not "selected" in the navigation menu or the antenna has failed. This should be a fairly easy troubleshooting process and we hope to get it working quickly. It worked perfectly "on the bench" so I'm thinking we made an installation error... The oil pressure is fine at the moment but we'd like about 10 psi more when the engine is hot... That's easily accomplished; the dry sump pump has a "pressure adjustment" screw that we can use to reduce the amount of oil "bypassed" within the pump. That adjustment screw has also been a persistent source of a small oil leak so we'll want to take care of that at the same time. The rear suspension is fine over large "whoops" but is a bit harsh over "washboard" type terrain. We've not had the rear seats occupied yet so we don't know if the reduced weight on the rear suspension causes the harshness. We'll be adjusting the rear shock bypass valves over the next few outings in an attempt to optimize the ride quality under a range of loading and terrain conditions. The fuel "rails" came with the engine core but they're not properly machined for the fuel injectors we're using. The engine previously used different fuel injectors that had provisions for seal retention so the fuel rails therefore weren't machined to provide that function. Our current injectors don't make provisions for retaining the "O-ring" seals and combined with fuel rails that also make no provision for it could lead to a major fuel leak and fire risk... Generally, the fuel rails should have a "step" machined into the injector pockets that ensures the "O-rings" are properly retained. We have new fuel rail "blanks" on order along with the tooling needed to properly machine the injector pockets for our fuel injectors. As soon as everything arrives, we'll fabricate and install new fuel rails that eliminate this issue. For now, we have a temporary solution in place - but we want a final solution as soon as possible.
|